Who makes the Philips 928137805390 DLP lamps?
Philips doesn't make lamps for their DLP TVs! Philips is the original lamp manufacturer for your Philips 928137805390 Lamp. In rare instances, Osram may also be the original, but they still use a Philips lamp driver, or ballast, so it's best to replace with a Philips brand UHP lamp!
How does the Philips 928137805390 DLP Lamp work?
- Philips 928137805390 lamps are pre-charged with about 15,000 volts
- There is no actual filament inside because it's a gas lamp
(Hg - mercury vapor) - Philips DLP lamps will fail continuity test
How long do Philips DLP lamps usually last?
- First Generation Philips lamps lasted from 2,000 to 3,000 hours or more.
- Second Generation Philips lamps will last up to 8,000 hours.
- Second Generation Philips lamps have better consistency.
- All depending on your usage and the type of lamp you have.
What are the benefits of replacing the entire lamp unit (the lamp and the enclosure)?
- Super quick installation.
- Just pop the old one out, and the new one in.
- Newer enclosures don't warp and are safer to re-use later.
- The cost is now almost negligible. You'll spend only $20 more for a lamp inside the enclosure from Discount-Merchant.com.
How easy is it to replace just the lamp?
It can take anywhere from 5-15 minutes depending on your personal dexterity with a screw driver, but replacing a lamp yourself is very straight forward. I can do it in 5 minutes!
Whether you have a Samsung, RCA, or Mitsubishi, swapping out the lamp is very easy. The ballast wires don't even have to go in any particular order because most DLP's use AC (alternating current, for those tech-savvy people).
Where do I purchase the lamps?
Philips 928137805390, sometimes written as SP.L6502G001 can be purchased from many places such as Discount-Merchant.com, which sells bulb-only and lamps with enclosures for various TV models. I highly recommend them because they are one of the largest parts distributors in the United States with a very loyal customer base. Any company can sell you lamps, but Discount-Merchant.com also provides free technical support and same day shipping--just read their reviews online!
What TV Models are compatible with the Philips 928137805390 lamp?
These are the compatible TV models for this part number, you can click on the TV model number to access the owners manual
NOTE: You're not always going to be able to see the part numbers and you shouldn't worry about them. The complete cage part number is what matters and this is usually on the lamp housing and on the right side of your TV. It looks like:

Symptoms of a bad lamp:
- If you hear audio, but have no picture
- If you hear a ballast click, but the lamp doesn't ignite
- If you can't see the lamp light up in the back of the TV
- If you have blinking lamp indicator lights
- Visual indication that the lamp is blown
- Dim picture after years of use
Symptoms of another part malfunctioning:
- Consistent or inconsistent clicking from the ballast
- Screeching or winding sounds from the color wheel
- No picture, no audio (possible power supply or ballast)
- Blurry picture, or truncated picture (DMD or light tunnel)
- No blinking lights, or different blinking lights
- Spots or blobs on the screen (prevalent in LCD projection)
How do I take my enclosure out of my TV?


What do I need to replace my lamp?
What you'll need:
- Phillips screwdriver
- New DLP Lamp (You can buy it from Discount-Merchant.com)
- Gloves are recommended
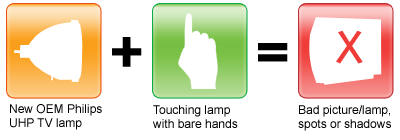
Note: You should handle the bulb with gloves or a lint-free cloth. Oils from your fingers can damage the bulb!
This is what happens when you touch the lamp with bare hands
1. Oils from your fingers get on the glass of the lamp.
2. When the lamp is on, the oils help heat up that particular spot on the lamp, called a hot spot.
3. That hot spot can shatter the glass on the lamp.
NOTE: The lamp can still be usable, but there will be a noticeable shadow in the picture.
Philips 928137805390 Replacement Guide


After installing a new lamp in the TV, you need to enter the “Lamp rating” list in the onscreen menu and select the alphabetical code that is provided with the lamp. The recommended Philips replacement Lamp is rated for 6000 hours, an F rating
The next step is to use the “Lamp replaced control” to tell the TV that you have installed a new lamp. This control resets the Lifetime Counter to 0 for the new lamp and begins keeping track of the lifetime of the new lamp.
1 Press the Menu button on the remote control to display the on-screen menu.
2 Press the Cursor Down button to select “Settings.”
3 Press the Cursor Right button to select the “General” menu.
4 Press the Cursor Down button repeatedly until “Lamp rating” is selected.
5 Press the Cursor Right button to enter the rating list.
6 If necessary, press the Cursor Down button as many times as necessary to select the letter for your replacement lamp.
7 Press the Cursor Left button to return to the “General” menu.
8 Press the Cursor Down button to select “Lamp replaced.”
9 Press the OK button to confirm that you have changed the lamp.
10Press the Menu button to remove the on-screen menu from the TV screen.
Poor picture quality.
Try another channel. Adjust the antenna. Check all wire connections.
No picture or sound.
Try another channel. Press the SOURCE button. Make sure the TV is plugged in. Check the antenna connections. Check that the Mute feature is off.
Picture rolls vertically.
Adjust the antenna. Check all wire connections. If you are using a VCR, check the tracking.